Google Lens for easier search and statistics
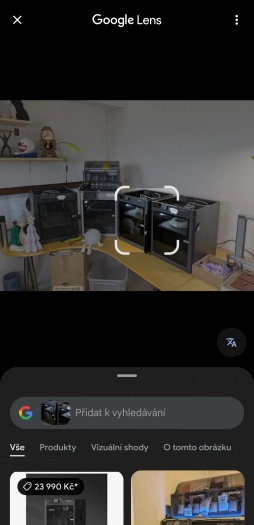
Google Lens can be a useful helper if you need to get more detailed information or identify an object from an image or photo taken. In addition, they are also excellent at translating foreign text into your native language.
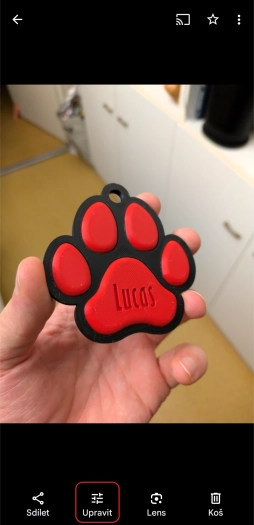
How to turn on Google Lens in Photos? Just open any photo and click the button in the bottom selection Lens.
The magical editor enhances photos beyond recognition
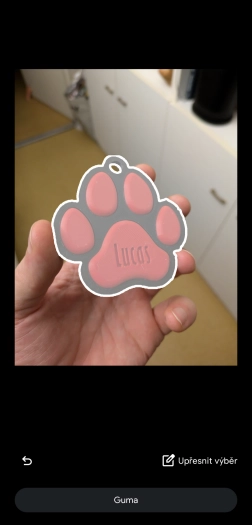
Relatively wide photo editing options are nothing new in Google Photos. But relatively new is a magical editor with which you can resize, move, or even remove objects from your photos.
To enter the Magic Editor, select a photo, select Edit and subsequently the Magic Editor icon in the lower left corner. Circle or tap to select the place you want to keep/remove and the tool Tire perform an action.
Creating collages and animations
Google Photos is not only a tool for storing and editing photos, it is also great for archiving or creating content for social networks. The application can create collages or a repeating animation from selected photos or videos.
To create a collage or animation, click at the top plus icon. Select whether to create collageor animationclick on the desired photos and let the application work. You can also make a video about your favorite person in the same way.
Deleting location data
If you allow the photo application to record location, information about the place where it was taken is stored in the metadata for each photo taken. This data remains saved even when shared, which may not always be desirable. Fortunately, there is a fairly simple way to retroactively remove location data.
Click on the photo three vertical dots in the upper right corner, slide your finger to the place with the location and click on pencil icon. Then just select in the new window Remove location and you are done. This feature may not work for some photos.
Another level of security with a lockable folder
The lockable folder is the perfect solution for those who want to hide some photos from others. Photos and videos placed in the lockable folder are protected by a character, PIN, fingerprint or face recognition and will not be displayed in the main gallery.
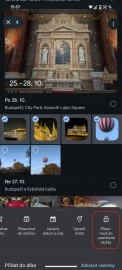
To create a lockable folder, mark the photos and videos you want to hide and v drop down menu select an option at the bottom Move to locked folder. If you are doing this action for the first time, go through the process of creating a locked folder and then confirm the addition of photos with the button Move.
Bulk download all photos at once
Backups are generally a good thing. Some rely on cloud solutions, others do not allow classic external drives. If you want to download your entire library at once without going through the photos individually, the Google Data Export tool will help you do that.
For bulk export visit takeout.google.comselect only Google Photosedit another one export settings, target folder for export and clicking the button Create export create it.
Automatic backup across all devices
One of the great advantages of Google Photos is the possibility of automatic backup immediately after taking a photo to your Google account. You only have 15 GB of storage space in the base, when it is full you can buy more space with a monthly subscription.
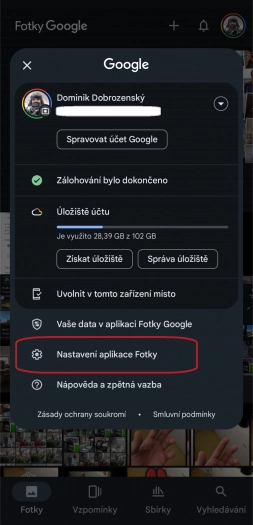
You can set automatic photo backup by clicking on your account icon in the upper right corner, by selecting Photos application settings and categories Backup. Here you can choose in what quality the photos will be backed up or whether or not the application will use mobile data in addition to Wi-Fi to back them up.
Grouping photos by face
If you think artificial intelligence is avoiding Google Photos just yet, you’re wrong. AI can already use machine learning to analyze the content of photos and group them, for example, by faces. This can be useful, for example, when you need to select the best photo of a certain person.
To turn on grouping by face, click on yours profile picture in the upper right part and subsequently Photos application settings. Here go to Preferencescontinue through Group similar faces to the field Groups of faceswhich you turn on. After some time, you will see the photos grouped in this way in the section Collections.
Intelligent search across the entire library
The search feature in Google Photos isn’t just for show. On the contrary, it can often significantly facilitate the search for a specific photo or video. For example, if you are looking for photos of wedding guests that you took last year, just type a keyword in the search wedding. The application itself finds photos that have something to do with this topic.
The search does not work completely flawlessly and cannot yet cope well with multi-word queries, but it is a relatively handy way to quickly get to specific content.
Quick sharing of photos and entire albums
Have you taken a large number of photos that you want to share with someone? Instead of tedious downloading and forwarding, all you have to do is create one album from the photos, which you can then quickly share with the target people.
How to do it? Mark all the photos you want to include in the album, click on plus icon in the upper right corner and select an option Album. After creating the album, click the button Shareset the sharing details and send the link to those you want to share the content with.
Another option is to create an album in advance, then upload photos to it and generate a sharing link at the end.
Share photos to a bigger screen
Sharing (casting) photos to a larger screen is useful, especially if you want to show off your vacation photos, for example. Google Photos supports sharing via Chromecast, for example, to a smart TV.
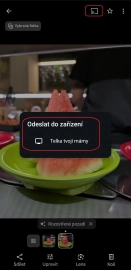
To share, just have your phone and TV connected to the same Wi-Fi network and click on any photos or videos the Cast icon in the upper right corner. Then it’s enough choose your TV and the sharing can begin.
Quickly select images across the library
Banality for some, considerable simplification for others. Instead of clicking and manually tagging each photo individually, you can tag multiple photos at once on your phone. Just put your finger on the display, mark one photo and then without lifting your finger run over otherswhich you want to include.
If you would like to tag all photos and videos from a specific day or month, just click on pipe icon and is marked.
Deleting photos uploaded to the cloud to save space
Need to free up space on your phone’s storage? One way to free up some space on your phone’s storage is to delete photos and videos that are backed up to the cloud but still on your phone’s memory.
You can achieve this by clicking on your account icon in the upper right corner and click on Photos application settings. Then go to Application and click the button Free up space on your device. By confirming, the app only deletes photos that are securely backed up on the cloud.
Recover deleted photos
Did you know that deleted photos stay in the cloud for another 60 days in case you want to restore them again? These photos are moved to the trash, which can be accessed by clicking on the category Collections and subsequent selection trash icon. Attention! The 60-day period only applies to prepaid items. Unbacked ones stay in the trash for just a month, then fly away.
Quick edit before sharing
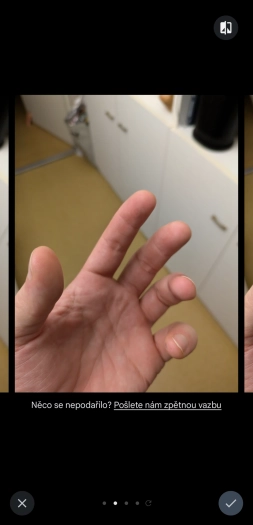
Quick Edit was introduced to Photos by Google relatively recently, and it’s for exactly what you think it is – a quick edit before sharing on social networks or with your friends. Depending on the different type of photo (sky, nature, buildings), the application will offer you different types of adjustments according to the content of the photo.
In addition, you can quickly add a different touch to the photo through several effects. Just open any photo, click on three dots in the upper right corner and then select any of the effects.
Do you have a proven tip of your own? Did we forget any? Let us know in the comments.
Source: www.cnews.cz


