
One of the controversial innovations of iOS 18 was the updated application Photo. The developers made too many changes and redesigned the gallery beyond recognition.
The most important app on the iPhone is broken in iOS 18, and you’ll have to live with it
Fortunately, Apple also realized the radical nature of all the changes and rolled back some of them. For example, in the first test versions it was possible to create several feeds from photos and videos with different sorting settings. It was necessary to switch between them with a horizontal swipe, which further confused users.
Such feeds have been removed from the application, and everything else needs to be configured manually for convenient daily work.
1. Disable unnecessary partitions
What is most confusing is the huge number of heterogeneous objects. Photo carousel, folders, lists, collections with vertical and horizontal scrolling. To make it easier to navigate, we disable items that we do not use.
How to set up: In the Photos app, scroll to the bottom of the page and tap Customize and reorder. In the menu that opens, uncheck the sections that you do not need. Do not disable the item Pinned Collectionsthis is one of the useful innovations that we will configure a little later.
I removed it for myself Recent days, People, Trips, Selection of photos, Albums, Shared Albums And Wallpaper offers. Finding the photos and videos you need has become faster, and unnecessary sections do not take up space in the gallery.
2. Swap partitions

Now that there are few sections left, you can swap them. We raise the most necessary ones to the top, and lower the rest below. If you don’t want to disable something, as in the previous section, you can safely move it down.
How to set up: In the Photos app, scroll to the bottom of the page and tap Customize and reorder. Drag the necessary items using the marker on the right and change the position of the sections.
3. Set up pinned collections

This is a section with favorite folders that can be pinned immediately below the photo feed. You can add several folders, scrolling between them will occur with a horizontal swipe.
How to set up: in the Photos app, find the section Pinned Collections and press Change. Mark the most necessary sections and arrange the appropriate order. The first three folders will be visible, to view the rest you need to swipe.
I find it convenient when I have quick access to videos, screenshots and recently deleted files. You can also display any albums, shared folders, any section or selection from the application here: portraits, panoramas, hidden ones, QR codes, etc.
4. Sort your shared photo feed
In the gallery, you can remove or add certain types of files, or even enable the display of only the necessary data.
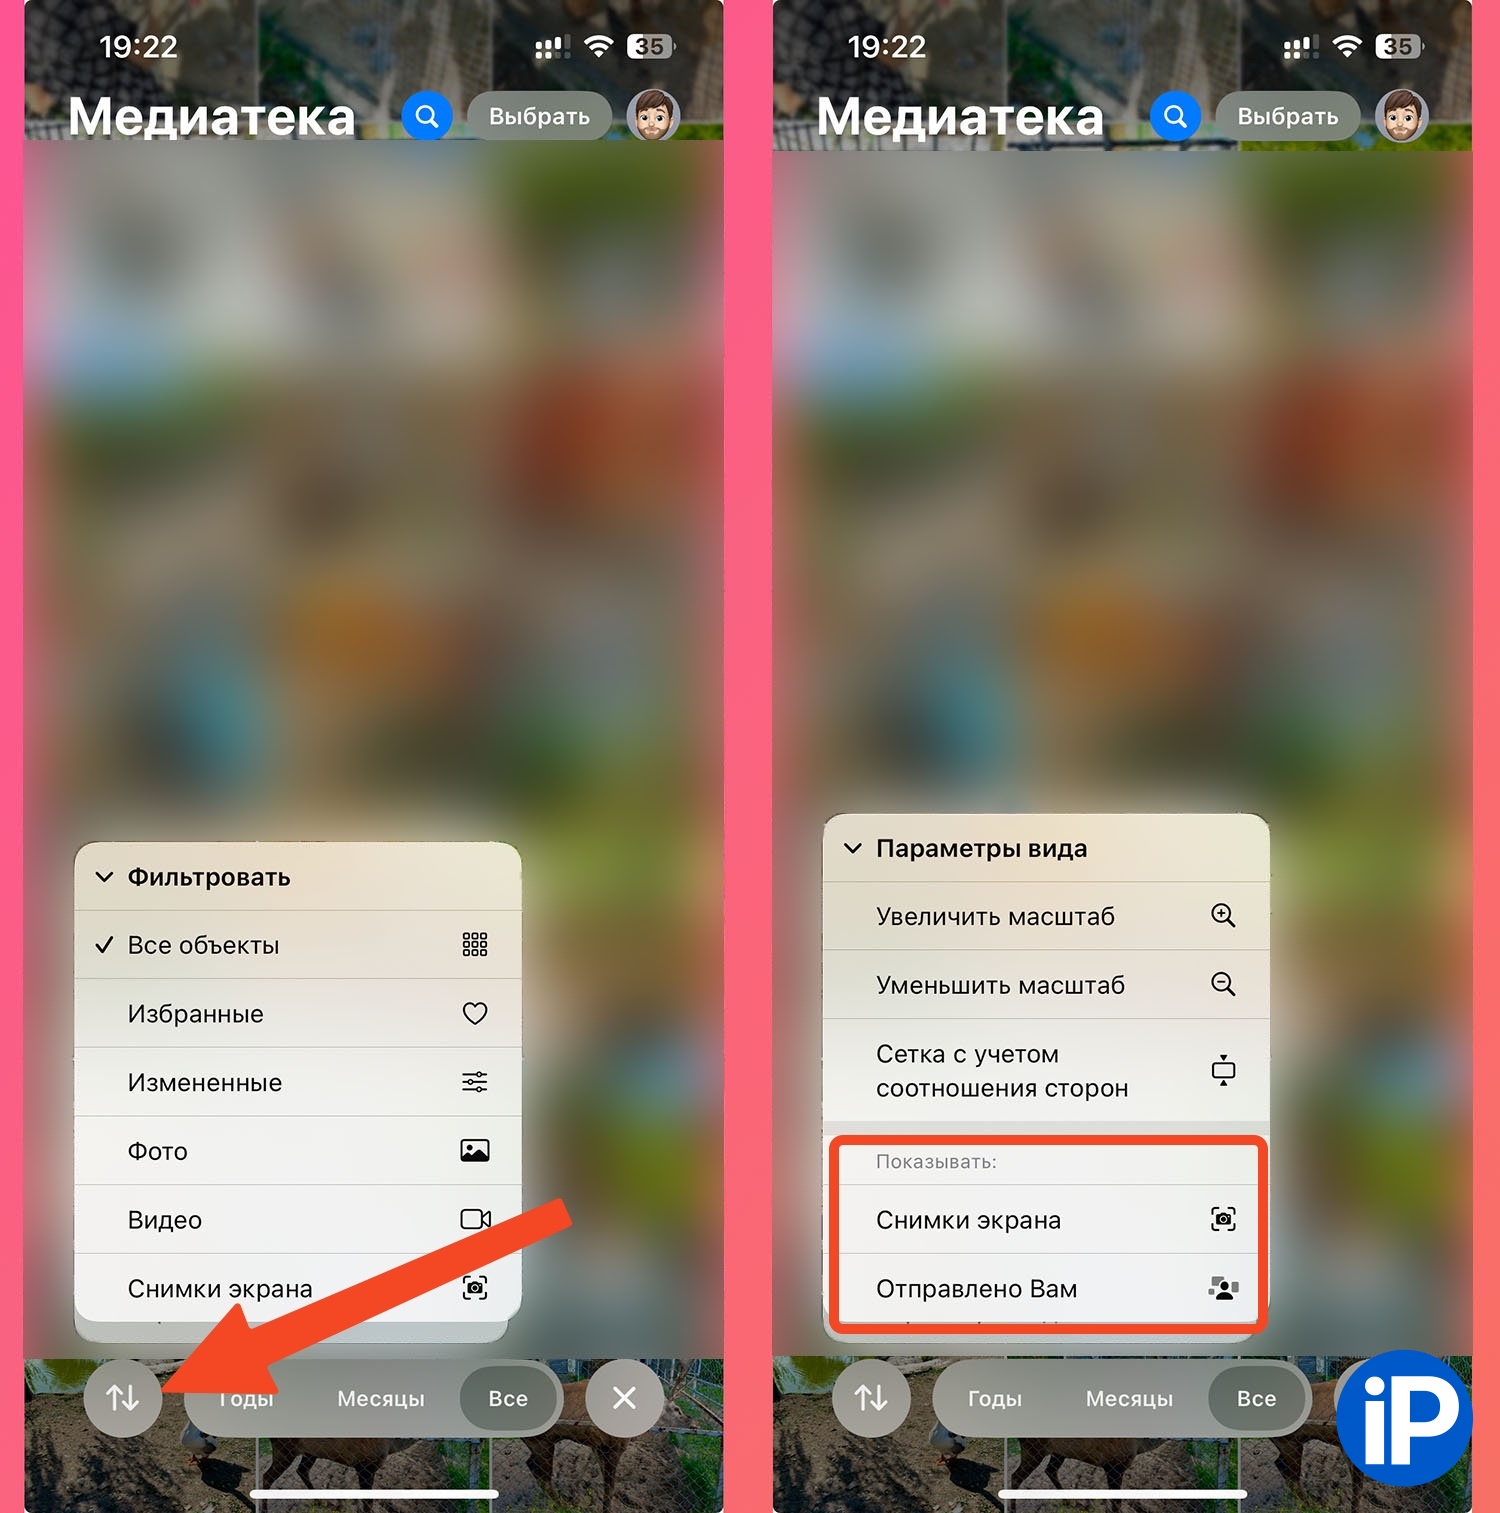
How to set up: In the Photos app, open the shared photo feed and click on the arrow icon in the lower left corner. Here you can configure:
► Sort by date or recently added. In the latter case, photos saved in the gallery will appear at the very bottom, and not in the general feed by the date of shooting. On the other hand, you can configure the folder Recently Saved and look for them there.
► Filter by data type. For example, show only photos, only favorites or only videos. This way you can remove unnecessary data from your feed in a couple of taps.
► Video options. The most useful option is to disable screenshots and saved images from other applications. We set up a folder for them in pinned collections so that they do not get confused with shared images.
5. Place sections side by side on iPad
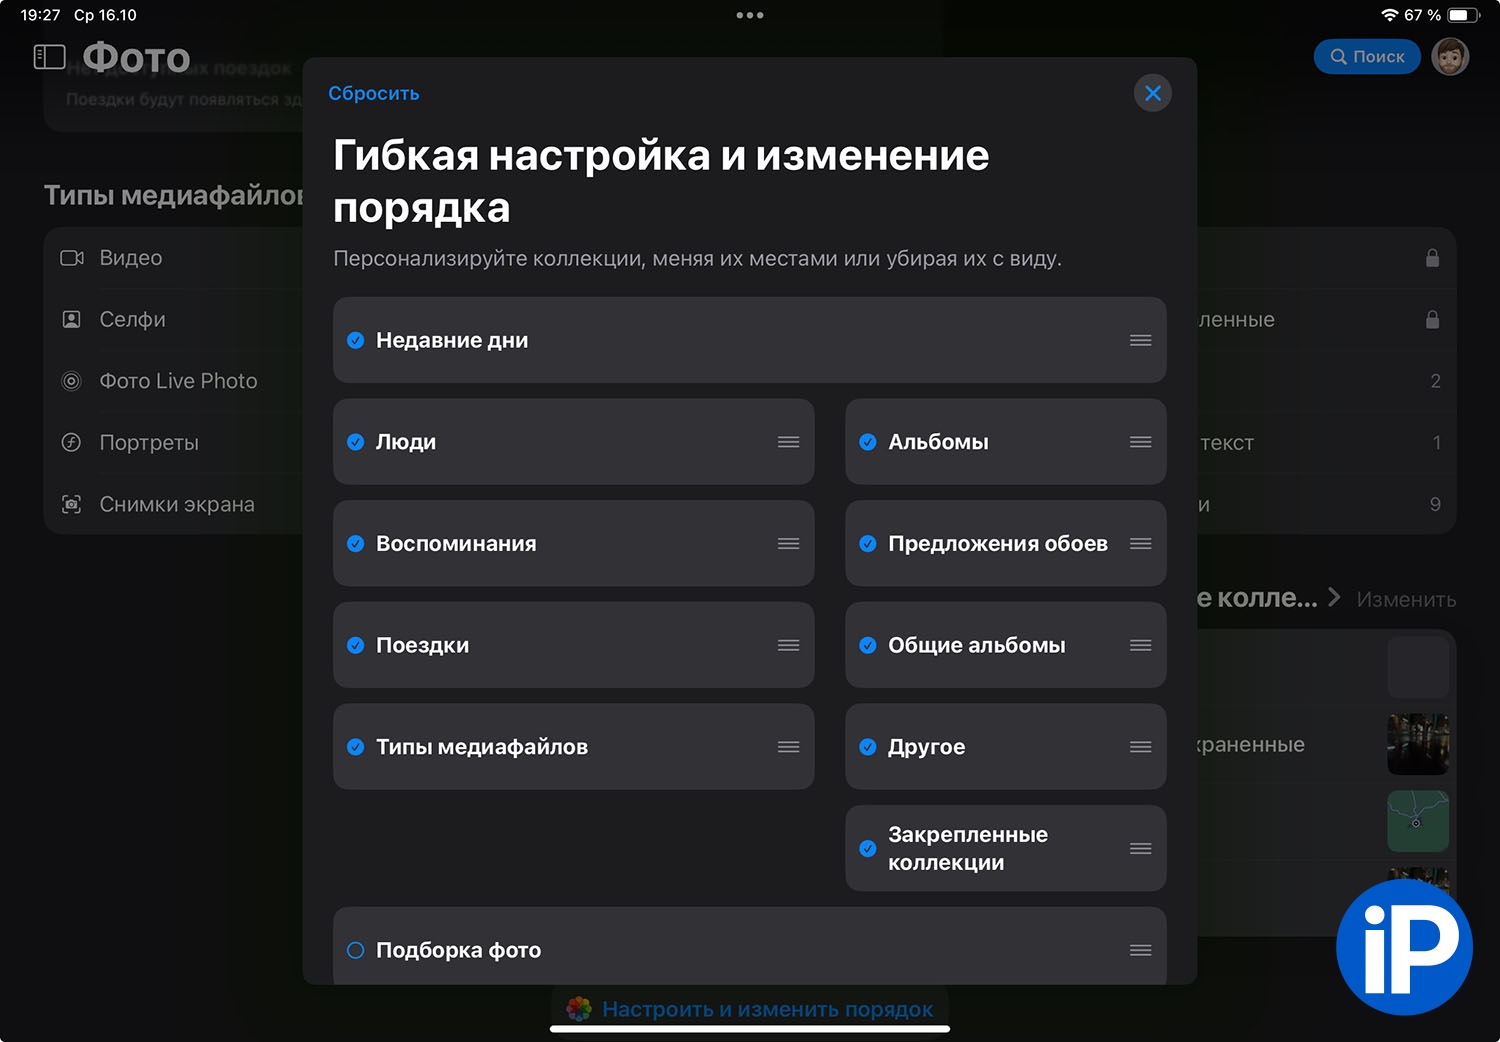
On a tablet, the application settings are a little more flexible. The sections don’t have to take up the entire width of the screen. They can be placed two at a time and save space on the screen. This way you can fit all the necessary folders into one to one and a half screens and quickly find everything you need.
How to set up: In the Photos app, scroll to the bottom of the page and tap Customize and reorder. Change the order of folders, disable unnecessary ones, and place sections side by side to save space.
Write in the comments your tips and tricks on how to set up the new Photos app in iOS 18.
Source: www.iphones.ru
